
First Aid:
First Aid Day is observed on September 8th every year. It is a global event that aims to raise awareness about the importance of first aid training and its role in saving lives.
On this day, various organizations and communities organize events and activities to promote first aid education and training. These events can include workshops, demonstrations, talks, and simulations that provide valuable insights into basic first aid techniques and emergency response.
The objective of First Aid Day is to empower individuals with the knowledge and skills required to respond effectively in emergency situations. The focus is not only on providing immediate assistance until professional medical help arrives, but also on preventing further harm or injury.
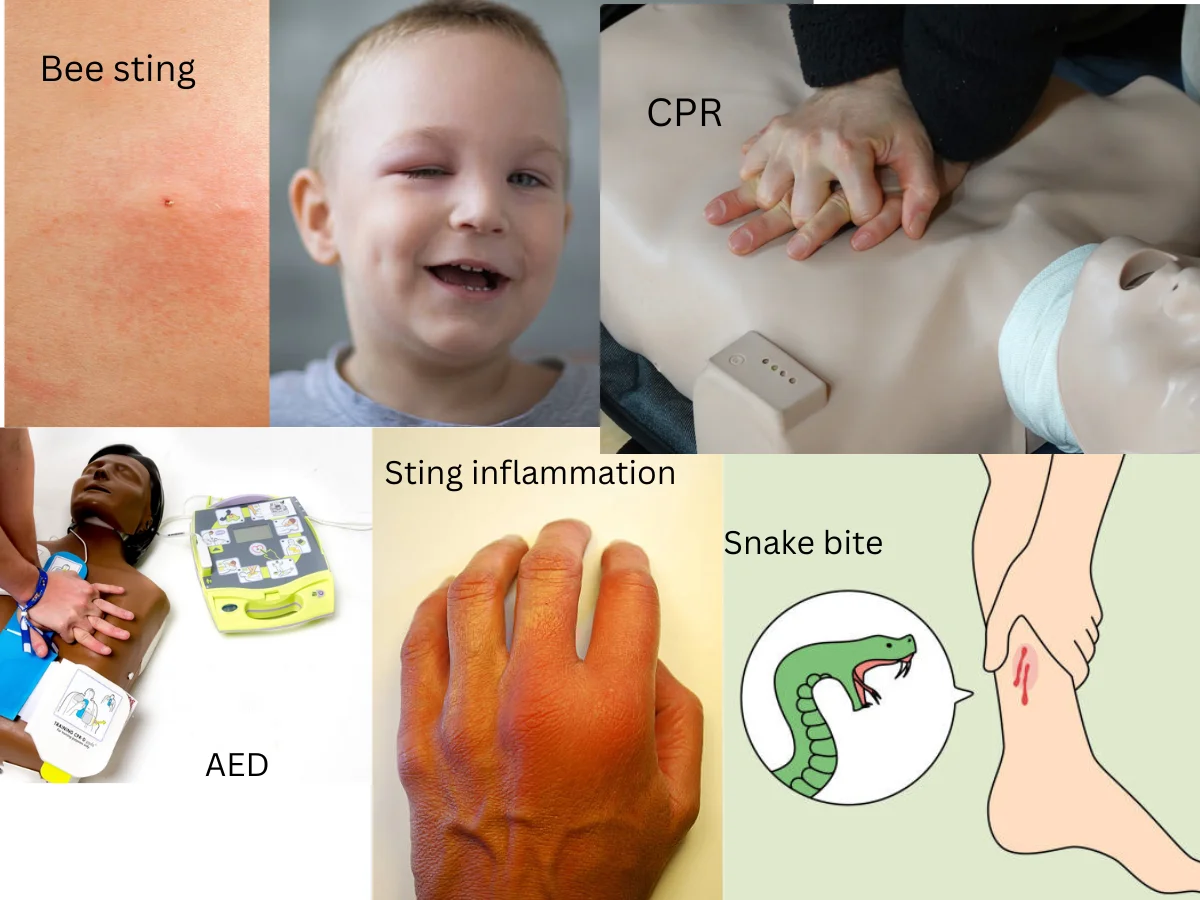
First Aid Day highlights the significance of timely and appropriate first aid in increasing survival rates and reducing the severity of injuries. It emphasizes the importance of quick action, calling emergency services, and administering basic first aid techniques like CPR, bandaging wounds, and managing choking or breathing difficulties.
This day also serves as a platform to recognize the efforts of first responders, healthcare professionals, and volunteers who provide immediate assistance to those in need. It is an opportunity to thank and appreciate their commitment and dedication towards saving lives.
It is important to note that First Aid Day is not a public holiday, but rather a global observance that encourages individuals to orient themselves with basic first aid principles and to seek proper training. It reminds people to be prepared, stay calm, and take prompt action during emergencies.
Overall, First Aid Day is a crucial occasion to promote first aid awareness and education, contributing to a safer and healthier society.
A first aid bag or box contains essential items to provide immediate medical assistance in case of an injury or illness. The specific items may vary, but here are some common items that should be included:
1. Adhesive bandages: Various sizes for covering small cuts and wounds.
2. Sterile dressings: Sterile gauze or pads to apply pressure on wounds to stop bleeding.
3. Adhesive tape: To secure dressings and bandages.
4. Antiseptic wipes or solution: To clean the wound and prevent infection.
5. Scissors: For cutting tapes, clothes, or bandages.
6. Tweezers: For removing splinters or foreign objects from the skin.
7. Thermometer: To check body temperature.
8. Disposable gloves: To prevent contamination when providing first aid.
9. CPR mask: A barrier device used during CPR to protect the rescuer and the injured person.
10. Pain relievers and fever reducers: Such as acetaminophen or ibuprofen.
11. Antihistamines: To treat allergic reactions or insect bites.
12. Burn ointment or gel: To treat minor burns and prevent infection.
13. Eye wash solution: For rinsing out foreign objects or chemicals from the eye.
14. Instant cold packs: To reduce swelling or relieve pain in case of an injury.
15. First aid manual or instruction booklet: To guide you on how to administer first aid.
The primary purpose of first aid is to provide immediate care to an injured or ill person before professional medical help arrives. Here are some reasons highlighting the importance of first aid:
1. Preserve life: First aid can help stabilize a person’s condition and prevent the situation from worsening, potentially saving their life.
2. Prevent further harm: Providing immediate care can prevent injuries or illnesses from worsening, reducing the risk of complications.
3. Promote recovery: Proper first aid techniques can hasten the recovery process by minimizing the effects of an injury or illness.
4. Reduce pain and discomfort: First aid can alleviate pain and discomfort, promoting comfort for the injured person until medical professionals can take over.
5. Prevent infection: Correctly cleaning and covering wounds can reduce the risk of infection and subsequent complications.
6. Minimize bystander effect: Knowing first aid empowers individuals to take immediate action in an emergency and not rely solely on medical professionals.
7. Provide reassurance: The presence of someone with first aid knowledge can provide emotional support and reassurance to the injured or ill person.
It is crucial to learn and regularly update one’s knowledge of first aid techniques as it can make a significant difference in emergency situations.
Adult CPR (cardiopulmonary resuscitation) is a life-saving technique that can be done by anyone to help someone in cardiac arrest. Here are the steps for performing CPR:
1. Assess the situation: Before starting CPR, it’s important to make sure the environment is safe and there are no immediate dangers. Check if the person is unconscious and not responding and not breathing normally.
2. Call for help: If you are alone, call emergency services or ask someone nearby to call while you start CPR. Time is crucial in cardiac arrest cases, so getting professional help as soon as possible is important.
3. Open the airway: Tilt the person’s head back gently and lift their chin to open the airway. Look, listen, and feel for any signs of breathing for about 10 seconds. If there is no breathing or only gasping, proceed to the next step.
4. Perform chest compressions: place your dominated hand (heel of hand)over person’s chest and between the nipples. Place your other hand on dominated hand and as it interlocking to the finger with other hand . Keep your arms straight, lock your elbows, and use your body weight to push down firmly and quickly. The compression depth should be around 2 inches, or 5 to 6 cm, and the rate should be at least 100-120 compressions per minute. Perform 30 chest compressions.
5. Give rescue breaths: 30:2 that means 30 compressions and two breaths if necessary!
After the 30 chest compressions, perform 2 rescue breaths. Pinch the person’s nose and shut and seal their mouth with yours, making a tight seal. If needed give 2 resume breath. Watch for the chest to rise and fall with each breath.
6. Continue cycles of compressions and breaths: Repeat the cycle of 30 chest compressions and 2 rescue breaths (30:2)Continue until emergency medical help arrives, the person shows signs of life, or you become too exhausted to continue.
Remember, CPR is a valuable skill that can save lives, but proper training is highly recommended to ensure you can confidently perform the technique in an emergency situation.
Infant CPR
Performing infant CPR in the correct sequence of steps is vital for effectively resuscitating an infant in cardiac arrest. Here is a step-by-step guide on how to perform infant CPR:
1. Check the Scene: Before providing any assistance, make sure the scene is safe for both you and the infant. If there are any potential hazards, move to a safe location.
2. Check Responsiveness: Gently tap the infant and shout loudly to check for any response. If the infant is unresponsive, you need to proceed with CPR.
3. Call for Help: If you’re alone, place the infant on a firm surface, then call emergency services or ask someone nearby to do so.
4. Open the Airway: Keeping the infant on their back, tilt their head back gently to open the airway. Use your fingertip to lift the chin while supporting the baby’s forehead.
5. Check for Breathing: Look, listen, and feel for signs of breathing. Watch for chest movement, listen for breath sounds, and feel for any air flow at the infant’s mouth or nose. Do this for no more than 10 seconds.
6. Begin Chest Compressions: If the infant is still unresponsive and not breathing or only gasping, start chest compressions. Locate the correct hand position by finding the landmark between the nipples. Place two fingers, one finger-width below this landmark, in the middle of the infant’s chest.
7. Compress the Chest: Use the heel of your hand to provide chest compressions. Compress the chest at least 1.5 inches (about 4 centimeters) deep and at a rate of 100-120 compressions per minute. Allow the chest to fully recoil between compressions.
8. Provide Rescue Breaths: After 30 chest compressions, perform rescue breaths. Maintain the head tilt-chin lift position and cover the infant’s mouth and nose with your mouth to create a seal. Deliver gentle puffs of air lasting about one second, watching for chest rise as you breathe.
9. Continue CPR: Alternate between 30 chest compressions and 2 rescue breaths. Continue this cycle until the infant shows signs of life or professional help arrives.
10. Follow External Defibrillation: If an automated external defibrillator (AED) is available, follow the prompts and attach it to the infant if directed to do so. Continue CPR as instructed until the arrival of medical professionals.
It’s important to note that these steps are a general overview of infant CPR. Proper training and certification in infant CPR are recommended to ensure confidence and competence in performing these lifesaving techniques.
In Infant Chocking Situations…
If an infant is choking, it is important to act quickly to help clear their airway. Here are the steps to take as first aid in the event of an infant choking:
1. Assess the situation: Determine if the infant is truly choking by looking for signs such as difficulty breathing, inability to cry or make sounds, and a bluish color in the face.
2. Support the infant’s head and neck: Place your hand along the infant’s jawline, supporting the head and neck in a slightly downward position.
3. Administer back blows: Position the infant face down along your forearm, keeping their head lower than their chest. Use the heel of your hand to deliver up to 5 firm back blows between the shoulder blades.
4. Check for visible obstructions: After delivering back blows, carefully check the infant’s mouth for any visible objects causing the choking. If you see something, remove it with your finger, if possible.
5. Administer chest thrusts: If back blows do not clear the obstruction, position the infant face up on a firm surface, such as a table or your thigh. Place two fingers in the middle of the chest just below the nipple line and deliver up to 5 chest thrusts, using gentle and quick upward pressure.
6. Continue back blows and chest thrusts: Alternate between back blows and chest thrusts until the object is dislodged or the infant becomes unconscious.
7. Call for emergency medical help: If the infant is still choking and becomes unconscious, have someone nearby call for emergency medical assistance while you continue with lifesaving measures.
8. Perform infant CPR: If the infant becomes unconscious, carefully lay them on a firm surface and begin CPR following the guidelines for infant CPR until medical help arrives or the infant starts breathing again.
Note: If you are not trained in infant CPR, it is best to call emergency services immediately and follow their instructions.
Remember, learning CPR and first aid techniques specific to infants and children is important to ensure you are prepared to handle emergency situations. It is recommended to take a certified CPR and first aid course.
Bleeding and Injured Situations…
If someone is bleeding or injured, it is important to provide immediate first aid treatment to help stop the bleeding and prevent infection. Here are the steps to follow:
1. Ensure safety: Before approaching the injured individual, make sure the environment is safe for both of you. If necessary, move the person to a safer area away from potential dangers.
2. Assess the situation: Quickly assess the person’s condition and the severity of their injuries. If there is severe bleeding, prioritize stopping the bleeding first.
3. Protect yourself: If available, put on gloves or use a barrier like a clean cloth or plastic bag to protect yourself from potential bloodborne diseases.
4. Control bleeding: Apply direct pressure to the wound with a clean cloth or your gloved hand. Maintain firm pressure until the bleeding stops. If blood oozes excessively apply another cloth on top of first cloth without removing it. Elevate the injured area if possible.
5. Clean the wound: Once bleeding is under control, clean the wound with mild soap and clean water. Gently remove any debris or dirt from the wound without causing further injury.
6. Apply an antibiotic ointment: Apply an over-the-counter antibiotic ointment to the wound if available. This can help prevent infection.
7. Cover the wound: Use a sterile dressing or clean cloth to cover the wound. Secure it in place with tape or a bandage, ensuring it is neither too tight nor too loose.
8. Seek medical help: Determine the seriousness of the injury and whether medical attention is required. If unsure or the injury is severe, call emergency services or take the person to the nearest hospital.
9. Provide comfort and reassurance: Offer comfort, support, and reassurance to the injured person while waiting for medical help to arrive.
It’s important to note that these steps provide general guidelines for first aid. The specific treatment may vary depending on the nature and severity of the injury. If in doubt, always seek professional medical assistance.
First Aid for Snake Bite:
1. Ensure safety: Move away from the snake and keep a safe distance. Do not try to kill the snake or catch the snake.
2. Stay calm: Panic can increase heart rate and spread venom more quickly through the body. It’s very important to keep the person calm and calm yourself too.
3. Call for help: Call emergency services immediately and explain that you have a snake bite victim. Provide the exact location and any relevant information about the snake (if known).
4. Immobilize the affected area: Encourage the person to stay still and immobilize the bitten limb or affected area, as movement can increase the rate of venom spread.
5. Remove tight clothing or jewelry: If possible, remove any tight clothing, jewelry, or constrictive items near the bitten area before it begins to swell.
6. Position the person: If feasible, keep the person at rest and allow them to lie flat with the bitten area below heart level. This may slow the spread of venom.
7. Apply a pressure immobilization bandage or splint: Apply a firm, elastic compression bandage to the bitten area, starting from the bite site and moving upward. The bandage should not be too tight but should be firm. Splint the affected limb to restrict movement and immobilize it.
8. Reassure the person and monitor vital signs: Offer reassurance and keep a watchful eye on the person’s breathing, pulse, and level of consciousness. If they deteriorate, be prepared to perform CPR if needed.
Please note that the exact method of first aid for snake bites may vary based on the specific snake species and regional guidelines. It is always recommended to follow the instructions provided by local authorities, medical professionals, or poison control centers.
First Aid for Bee or Insect Sting:
1. Move to a safe area: If possible, get away from the area where the sting occurred. This helps prevent further stings or attacks.
2. Remove the stinger: If a bee or wasp stinger is visible, gently scrape it off the skin using a credit card or the edge of a blunt object. Do not squeeze the stinger, as this can release more venom into the body.
3. Wash the sting area: Clean the affected area with soap and water to reduce the risk of infection.
4. Apply a cold compress: Use a cold pack, ice wrapped in a cloth, or a cold wet towel to apply to the sting area. This helps reduce swelling and alleviate pain. Keep it in place for 15-20 minutes at a time.
5. Pain relief: Over-the-counter pain relievers like ibuprofen or acetaminophen can help alleviate pain and reduce inflammation. Follow the recommended dosage on the packaging.
6. Apply a topical cream or ointment: Over-the-counter creams or ointments containing hydrocortisone or calamine lotion can help reduce itching and irritation.
7. Watch for signs of a severe allergic reaction: If the person shows signs of a severe allergic reaction, such as difficulty breathing, swelling of the face or throat, dizziness, or rapid heartbeat, call emergency services immediately (in many places, this is the number 911).
8. Seek medical attention if necessary: If the sting does not improve after a few days or if it worsens, seek medical attention. Some people may have a stronger reaction to stings, and a doctor may prescribe additional treatment or medications.
Remember, these steps are general guidelines for first aid treatment for snake bites and bee or insect stings. If you are unsure or the situation is severe, it’s always best to seek professional medical help.
You may also like: https://www.firstaidproadelaide.com.au/blog/how-to-use-a-first-aid-kit-and-its-contents/
More: https://easymedicine24.com/medical-terminology-2/
Thank You…
1 thought on “First Aid-1”